Friday 22 April 2016

Leanne | Mother's Day Mini Books...

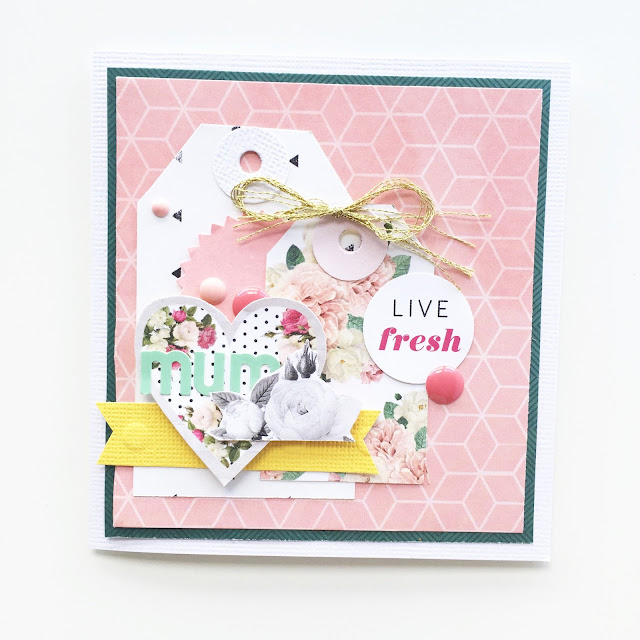
Hello Sassy Friends! Today I am sharing a collection of mini books that can easily be converted from a basic card. I am planning to use this collection of Pink Paislee | C'est La Vie paper crafted cards with my children, as Mother's Day gifts for their grandmothers. :)


Step 1. Create a simple card using layers of Pink Paislee C'est La Vie patterned papers. I've made a collection using cardstock sized at approximately 4.5" wide. This is a great opportunity to use up any left over paper scraps!


Step 2. Using plain printer paper, cut to size, slightly smaller in width and length to the card you will insert it into, and staple the sheets together.


Step 3. Apply adhesive to the back to the paper stack to keep it firmly in place once inside the card.


Step 4. Gift as is or (as I plan to do) hand over the mini note books to your children so they can add individual messages to someone special on Mother's Day.


Thanks for visiting ..x

Sassy Supplies:

C'est La Vie Glittered Cork Stickers Hearts C'est La Vie Word Jumble Stickers Word Jumble Black W/Gold Ces't La Vie 12x12 Paper #1 Ces't La Vie 12x12 Paper #10 Ces't La Vie 12x12 Paper #2 Ces't La Vie 12x12 Paper #3 Ces't La Vie 12x12 Paper #6 Ces't La Vie 12x12 Paper #7 Ces't La Vie 12x12 Paper #8 Cienna Mint Alphabet Stickers I AM Enamel Dots 60pk MME Market Street Ashbury Metallic Enamel Dots Fine & Dandy Dies 5/Pkg Bow/Prize Ribbon

Photobucket

Saturday 16 April 2016

Agnus | Project Life with Simple Stories Heart

Hi again :) I'm back with another project life share based around the beautiful Simple Stories 'Heart' Collection. These 'Simple Sets' include cut apart sheets, patterned papers as well as a couple of sheets of stickers, and I wanted to share how I use ready made designs to create custom cards for my pages. 


Although this particular set is themed at preserving the memories of a lost loved one, I found that the elements were very versatile and could easily be used to document day to day life.  
Whether you document your album in a weekly or monthly format, the beginning of a new month often requires a title cards, and this is the perfect opportunity to add create a customised card. For this card I began by cutting off a portion of the diamond print card from the 'Simple Set' and combing it with some mint card stock from the Echo Park Gold Dot Collection. I like the way the patterns work together, and the gold foil detail helps to add extra interest. 


I grouped stickers from the 'Simple Set' along with a wood veneer piece from the Simple Stories 'Life in Color' pack and a stamp from Heidi Swapp's Memory Planner range to create the title. I then grouped a cluster of smaller stickers over a Heidi Swapp Memory Planner Tab  which I stitched to the top of the card.
When choosing which filler cards to use for the week, I often look for designs that can be enhanced with accents, and working with the printed design on one the cards I used my favourite Bohemian Typewriter font to add the date and another wood veneer piece to create a simple but cute personalised card.  

I like to use layers and a mix of textures to help add interest to my pockets, and began this card by cutting out a portion from one of the 12x12" papers from the pack to use as a background for my jounraling. I secured a Simple Stories 'I Am' Photo Overlay to the base then cut down another card from the set to print my journaling onto before mounting it to the center of the overlay. I added a few wood veneer pieces and sticker for extra depth. 
I loved the look of one of the patterned papers from the pack and decided to recreate the ombre  colour effect to use behind some gorgeous gold foiled vellum from Crate Paper's 'Hello Love' Collection
I used a wet brush to spread a light layer of water onto water colour paper then dipped the brush directly onto a mint Faber Castell Gelato from the Mix & Match Metallics pack and transferred the colour onto my card - applying more colour to the bottom of the card to create a similar graduated look.   

I used the other portion of the diamond print card from the first pocket to add interest to my printed journaling and really like the way it helps to tie both pages together. I framed the card with another one of the gold foiled photo overlays, adding one of the Memory Planner Word Jumble Stickers behind the wood veneer. The sticker pack include a sheet of clear, velum and black stickers with gold foiled phrases.   

Of course you cards can't have all the attention, and sometimes the photos need a bit of dressing up too!
Products from the Sassy store...


Photobucket

Friday 15 April 2016

Leanne | C'est La Vie Mini Album Tutorial..

Hello Sassy Friends!

Today I am going to share with you a step by step tutorial on how I created the front cover of the mini album I shared with you last week.


Gather your supplies:
watercolour paper, water colour paints, C'est La Vie patterned paper from Pink Paislee, butterfly die or punch, enamel dots, embroidery thread, foam dots.


step 1. Using a small off cut of water colour paper, create a simple tag and thread the hole with embroidery thread to match your patterned paper. Paper punch or die cut three butterflies in varies sizes.


step 2. Wet the water colour tag with water, then apply a small amount of paint. Continue to add paint until you are happy with the coverage on the tag. Allow to dry.


step 3. Trim a piece of watercolour paper and the C'est La Vie #3 paper to 4x4in. Trim the middle from the patterned paper, leaving the lower edge slightly wider to create a polaroid effect. Fussy cut a flower image from the C'est La Vie #10 paper.


step 4. Wet the water colour card generously with water and then apply the paint the same as with the small tag. Allow to dry. Once the paint has dried, apply foam tape/dots to the reverse side of the patterned paper and carefully line up the two 4x4in squares.


step 5. Start to assemble the cover. Layer the butterflies onto the tag and fold the wings upwards. Adhere the tag to the polaroid frame. Add the fussy cut flower image beneath the tag layer and adhere the wood veneer sentiment to the lower polaroid edge.


step 6. Finish the front cover by adding it to a large Heidi Swapp Color Wash water colour tag. Complete with enamel dots and the C'est La Vie word jumble stickers.

Thanks for visiting..x

Sassy Supplies:

Ces't La Vie 12x12 Paper #10 Ces't La Vie 12x12 Paper #3 Ces't La Vie 12x12 Paper #1 Ces't La Vie 12x12 Paper #8C'est La Vie Word Jumble Stickers Word Jumble Black W/Gold Martha Stewart 3 in 1 Butterfly PunchMME Enamel Dots The Sweetest Thing Honey Love Color Wash Watercolour Tags Make Pretty Stuff Watercolour TagsOn My Desk Wood Veneers On Trend 2 wood Veneer Shapes 14pk 

Photobucket
09 10